A fairly open first tee shot, but tee aims a little to the right, so check your alignment. Good players can take on the fairway bunker on the left which opens up the green. There are bunkers both sides of the green and danger lurks if you go long.
- Par 4
- 390 Yards (White)
- 374 Yards (Yellow)
Difficult tee shot demanding accuracy, plus the added factor of the left to right slope making the 2nd shot tough. The approach shot needs to come in from the left and you can use the slope at the front of the green to help feed the ball in. A bunker guards the right hand side of the green
- Par 4
- 447 Yards (White)
- 410 Yards (Yellow)
The tee shot needs to be down the left side, avoiding the large bunker which will feed to the fairway. You can reach in two if you hit a good drive, but if not, lay up and play a 100yard pitch into the green, avoiding the bunker on the right side of the green. This green is long from front to back so check flag position before playing into the green.
- Par 5 / 4 off yellow tee
- 495 Yards (White)
- 410 Yards (Yellow)
Wind direction plays a factor with this hole. If the wind is against you this is a tough par 4 but if the wind is with you, let it go! You can drive up the right to be safe, or try to drive to the centre where the ball will feed down the steep right to left slope to the flat part of the fairway - watch out for the fairway bunker down there though. Your 2nd shot needs to come in from the right avoiding the bunker front left.
- Par 4
- 415 Yards (White)
- 395 Yards (Yellow)
Plateau green with bunker on the front right. Take a line just left of the bunker but do not miss the green as it is difficult up and down from there.
- Par 3
- 150 Yards (White)
- 134 Yards (Yellow)
Alignment is important as tee aims slightly to the left. Get a good drive away and you can reach in two! Green is guarded by two bunkers left and right, general contours feed right to left.
- Par 5
- 510 Yards (White)
- 496 Yards (Yellow)
Dogleg hole right to left. You need to work the ball right to left as tee aims very straight which could get you in trouble. Avoid the fairway bunker on the left. The green is reachable in two in the summer months (if you are a big hitter), but if you play more conservatively lay back from the fairway bunker which is 50 yards from the green. The green is long and difficult to see the pin position. Humps to the right of the green assist the ball feeding in towards the green.
- Par 5
- 532 Yards (White)
- 511 Yards (Yellow)
Tee shot needs to be down the left of the fairway, avoiding the fairway bunker. Fairway slopes left to right and downwards after the bunker, which can affect your 2nd shot. Best to aim slightly left with your 2nd shot to the two tier plateau green. If you look right there is a fantastic view of Lullingstone Castle.
- Par 4
- 381 Yards (White)
- 363 Yards (Yellow)
Check wind direction before you play this hole. The green is guarded by bunkers left and right and is long and narrow, so take plenty of club on this hole. As you walk towards the green look left across to the 11th green to check out the pin position, you will need it later in your round. There are wonderful views down the valley on this hole so make sure you look out for them.
- Par 3
- 186 Yards (White)
- 163 Yards (Yellow)
This is a fairly straight forward hole, although you need to drive slightly to the right side of the fairway which slopes right to left. The green is guarded by bunkers short, left and right.
- Par 4
- 387 Yards (White)
- 366 Yards (Yellow)
Hole goes along a valley, tee shot needs to avoid fairway bunker on the left. It is possible (for long hitters!) to reach in two in the summer months but mainly lay up at the bottom of the slope and have a 100yard shot to this elevated green. Shots need to come in from the right where you have banks to help feed the ball down to the green, don’t miss left otherwise bunkers will get you.
- Par 5
- 553 Yards (White)
- 527 Yards (Yellow)
Check alignment on this hole, drive should be just left of the right hand fairway bunker. Fairway slopes from right to left which makes 2nd shot tough. Green is guarded by bunkers left and right, the wind direction will have a factor on this hole.
- Par 4
- 437 Yards (White)
- 423 Yards (Yellow)
It is important to get a good drive away from this long, uphill par 4. Check wind direction on this hole before playing the tee shot, green is guarded by bunkers front left and front right, take enough club to carry them, banks at back of green will assist you.
- Par 3
- 188 Yards (White)
- 177 Yards (Yellow)
Accuracy with your tee shot is required on this hole to avoid an old bomb hole and tree on the right. The 2nd shot is played slightly uphill to the green which is guarded by a deep bunker front right. It is difficult to see the bottom of the flag, so is best to hit 2nd shot in from the left.
- Par 4
- 332 Yards (White)
- 317 Yards (Yellow)
Drive needs to avoid fairway bunker left and you can get blocked out by the trees on the right if you go too far right, so nice straight drive here required. Green has 2 bunkers left but has banks on the right and back to help with 2nd shot.
- Par 4
- 380 Yards (White)
- 327 Yards (Yellow)
Take a line with your tee shot on the green keepers compound to assist alignment, avoiding fairway bunker right, if you want to be extra safe take a line towards single tree on the left. Green has no bunkers guarding it, but out of bounds lurks left of the green.
- Par 4
- 375 Yards (White)
- 362 Yards (Yellow)
The 17th is a straight forward par 3 with bunkers right and left. Difficult to see pin position due to the mound at the front of the green. Best to come in slightly from the left.
- Par 3
- 147 Yards (White)
- 131 Yards (Yellow)
The hole goes down over the hill to green with trees surrounding it. Position from the tee shot required, slightly left side of fairway the best option, although do not hit to far else you can block yourself out as trees narrow entrance to the green, protected by bunker front right.
- Par 4
- 336 Yards (White)
Dogleg hole which again position from the tee is vital, you can cut the corner if you fancy your chances! Which would leave a short pitch to the green. Be careful not to go long with your 2nd shot.
- Par 4
- 354 Yards (White)
Tough par 4 with trees both sides of the fairway, green is protected by two bunkers front left plus green slopes to the right.
- Par 4
- 382 Yards (White)
Chance of a birdie on this downhill hole just do not hit your tee shot right, play slightly left leaving a pitch to the green, you can drive the green on this hole!
- Par 4
- 278 Yards (White)
Tricky par 3 which slopes right to left, pitch the green or use the bank on the left, the green is unbelievable difficult to putt on good luck!
- Par 3
- 151 Yards (White)
Straight away par 4 which slopes right to left, best to drive up the right side green has a bunker front left.
- Par 4
- 301 Yards (White)
Uphill hole tee shot again needs to favour the right side as slopes from right to left. Very narrow green.
- Par 4
- 297 Yards (White)


View our current vacancies here.


Our Pitch & Putt is now OPEN!


ALL GREENS ARE OPEN
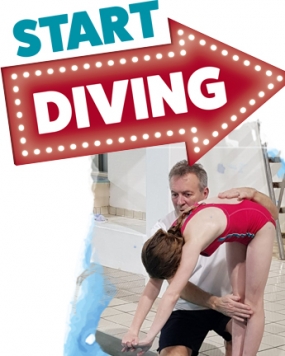
Lessons
25
15

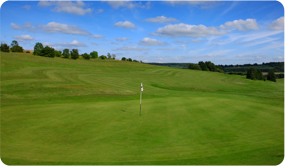
All greens are open